
Sanding & Restaining Wooden Floors
If you’ve ever uncovered timber floors beneath carpet or stared longingly at your scratched old floorboards, dreaming of a fresh look you’re not alone. For me, setting the tone of the home design by having the right flooring foundation colour is everything. If the floor tone is out, it makes everything else look wrong. That’s why altering the timber floor tones is one of my favourite aspects of a home renovation, because of the resulting transformation. But before you dive into hiring a floor sander or picking a stain colour based on a Pinterest photo, here’s a rundown on some need-to-knows.

Step 1: The Process
Sanding and restaining timber floors is a multi-step job that’s best done by professionals. I’ve actually seen several people do a great DIY job, however they’re very handy, have done their research, and have the right gear. But still, the colour tone is crucial and the professionals know exactly how to get the right one. Here’s what’s involved:
Prep the Space – Move out all furniture, take down curtains, and seal off adjoining rooms — this is a dusty job.
Sanding – The old finish and top layer of timber are sanded back using industrial sanders. This removes any existing stain, sealer, scratches, or discolouration.
Staining (Optional) – A wood stain is applied to change or enhance the timber’s natural colour.
Sealing – A protective topcoat is applied over the raw or stained wood. This could be a water-based polyurethane, oil-based poly, or hardwax oil finish, depending on your lifestyle and aesthetic.
Timing tip: Depending on your house size and number of coats, you will need to vacate for 3–5 days and then you can’t walk on the floor for another week — plan ahead!

This home had very warm/orange floors that were not in keeping with the Cape Cod aesthetic we were trying to achieve.
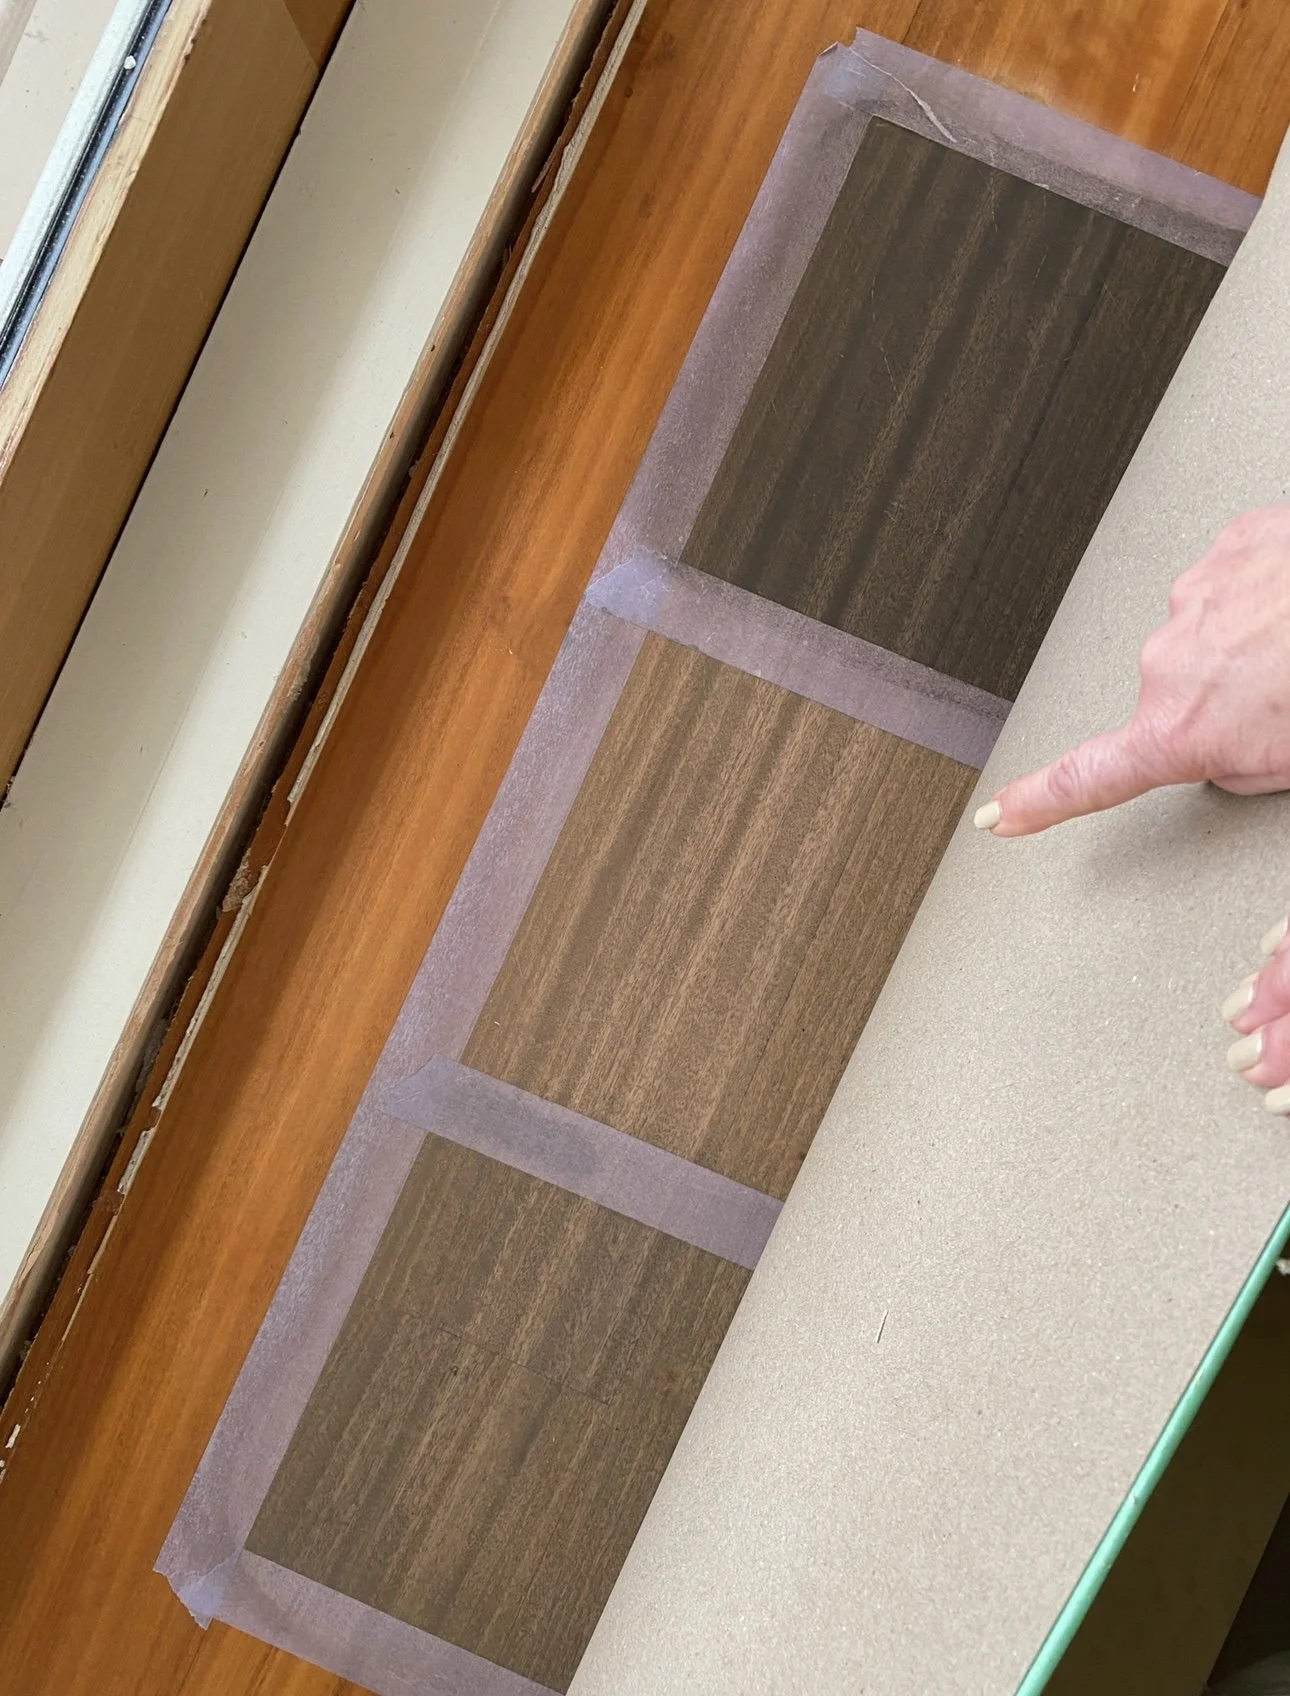
These are the three variations I asked the sander to sample, because I think having a shade above and below helps make the decision easier. In this case the mid shade was my favourite - it is a natural oak finish but has an eight grey-wash added to temper the warm tones.
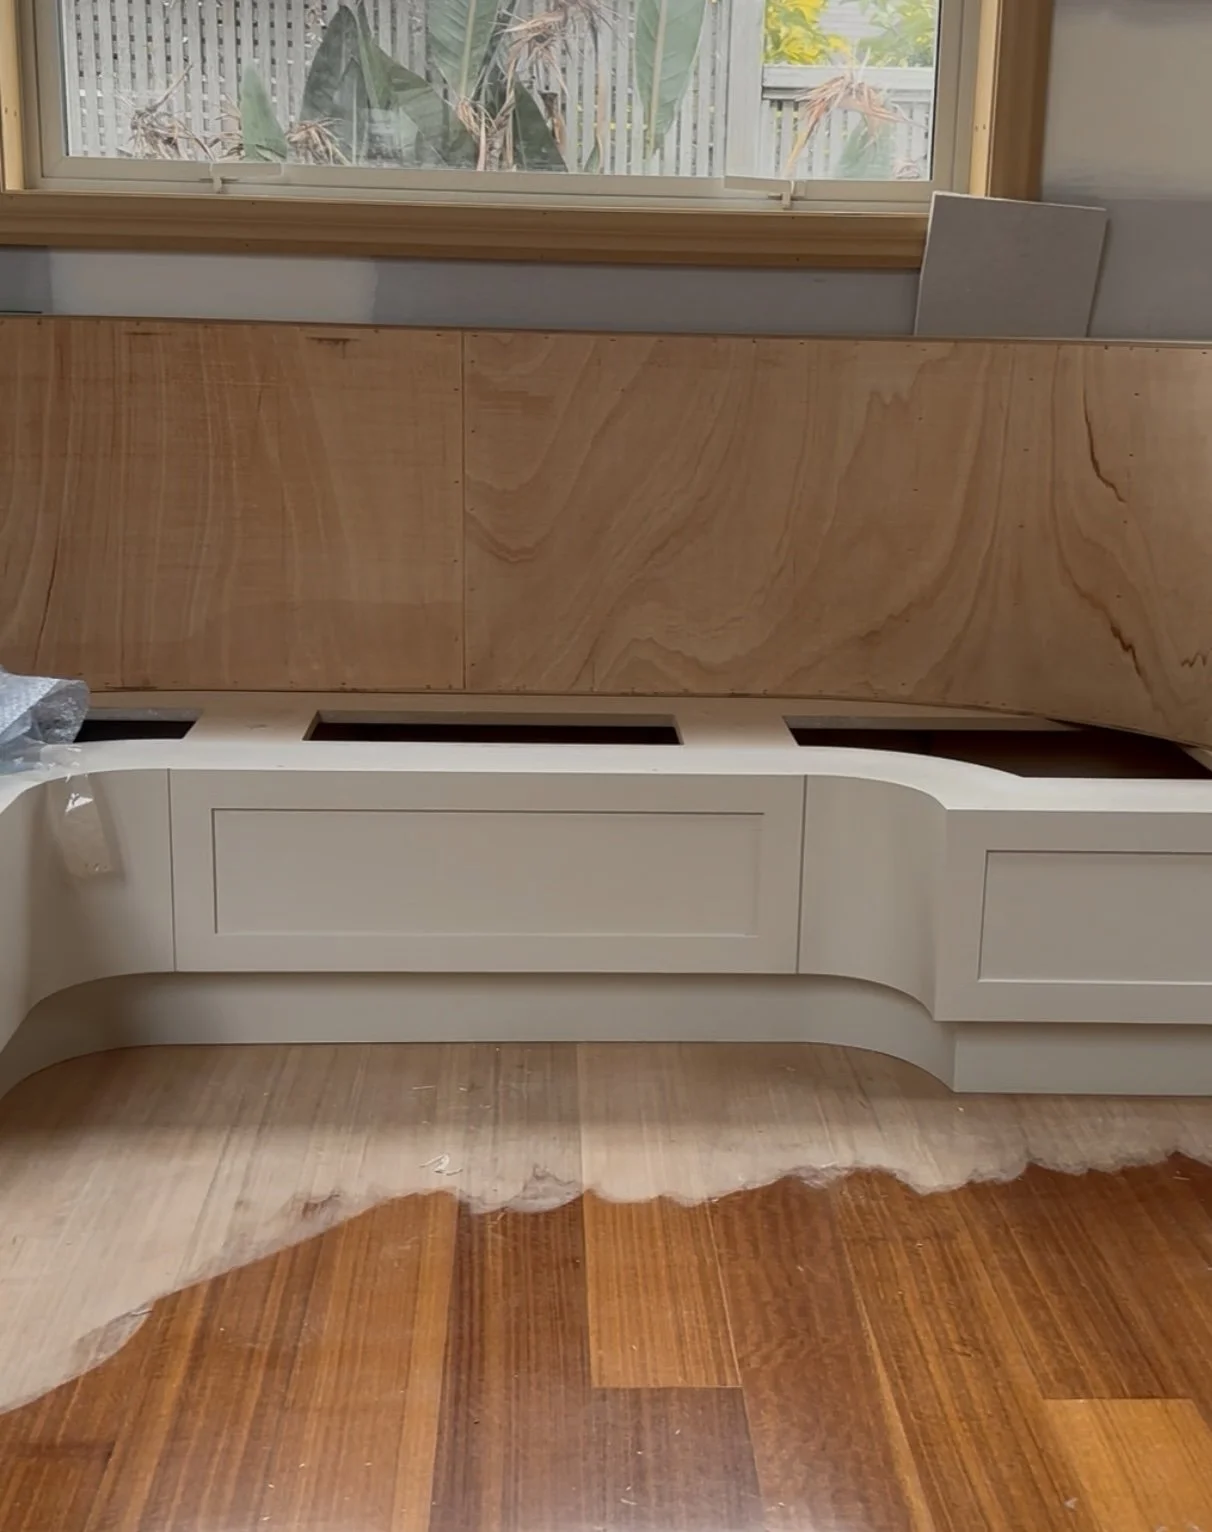
It’s crazy seeing the transformation once the sander gets to work.
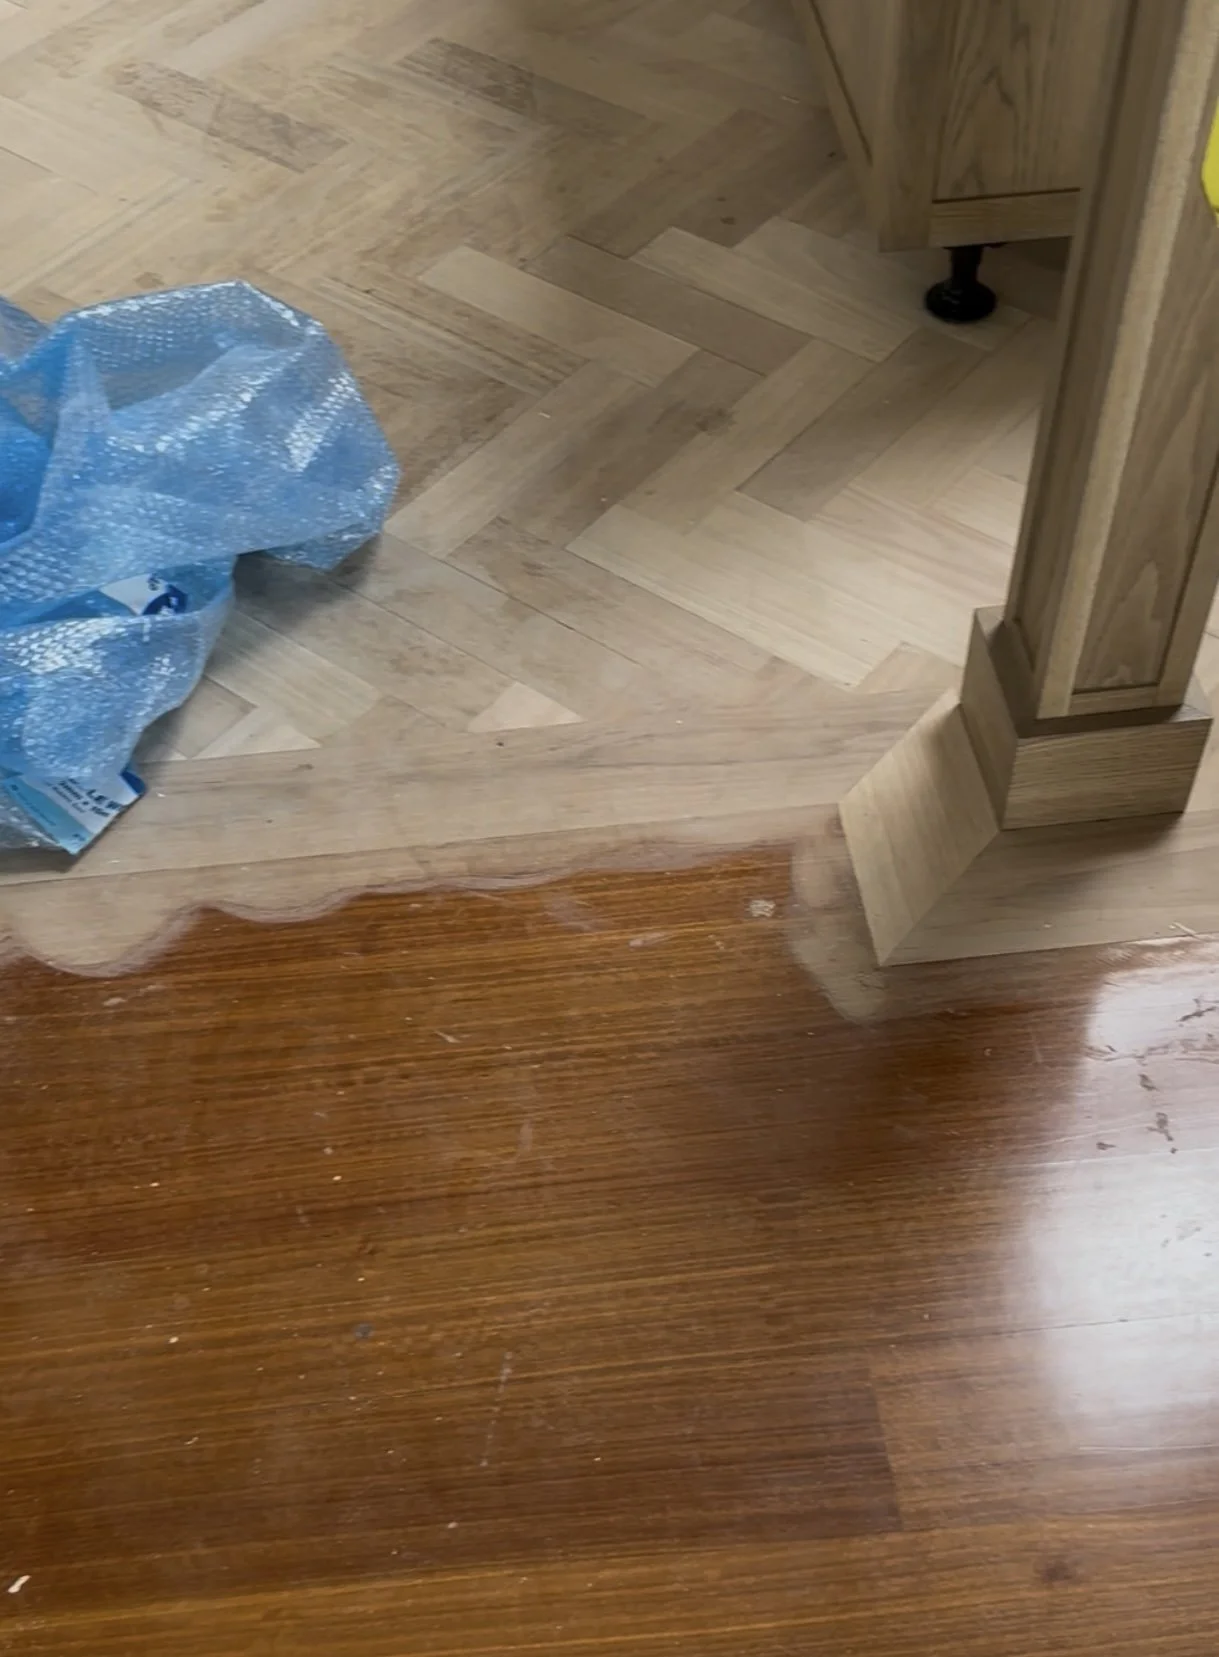
To take it a step further, for this renovation I asked the flooring professional to cut out the existing kitchen floor, and replace it with herringbone timber, then stain both the same colour. This was so the herrinbone created a zoning effect for the kitchen, without changing the colour.

He did so well, how good is this match!

Here’s how the new stain looks in the living room.
Step 2: Choosing the Right Stain Colour
This is where the magic (and the risk) lies — get the stain wrong and the whole vibe can feel off. My biggest learning is how many different timber species were used to create original floors in New Zealand, and how each one has a different polyurethane on it changing the colour even further. So when it comes to restaining an old floor it’s not a matter of picking a colour and expecting that’s what you’ll get, the same stain will turn out differently on each timber variety. We have Macrocarpa, Kauri, Pine and Rimu to name a few, and I’ve also come across several Australian native hardwoods used here.
So, tips to get it right:
Have a sample of a floor colour to give your flooring professional. Don’t get set on it as you may not be able to achieve that exact tone, but at least it’s a guide.
Ask the floor sander to test on your actual floor as the colour varies with each timber species. A stain that looks blonde on oak might go orange on pine or jarrah. Always test a few swatches in different light. And ask them to create at least three samples, one of the colour you want, then a shade above, and a tint below.
Think about undertones – do you want warm (honey, chestnut, golden), cool (smoky grey, driftwood), or neutral (natural oak, walnut)?
Take your wall colour, carpet and cabinetry into account – especially if your kitchen, skirtings, or furniture are timber too. Does your interior fitout throw cool, or warm? If you oppose this with the floor, everything may clash or compete.
Consider your light – Dark stains look dramatic but can make a small space feel closed in. Lighter or mid-tones often work best in NZ homes with our natural light.
Can you lighten a dark floor? Yes, but with a few caveats. If you have previously stained timber in a dark tone (like walnut, ebony or chocolate), you can sand it right back to raw timber and go significantly lighter, think natural oak or even a pale Scandinavian-style blonde. The catch? It depends on the species of timber and how deep the original stain penetrated, so you won’t know the exact colour tone you can achieve until you’ve sanded the current floors back.
For example:
Oak and rimu sand back beautifully and can often go 3–4 shades lighter.
Pine and macrocarpa can be lightened, but their grain can pull yellow or orange tones — so a whitewash or grey-based stain may help balance it.
Engineered or veneered floors may not sand well more than once — always check the thickness of the top layer.
The key is a thorough professional sand to fully remove the previous coating. Then once you're down to raw wood, you can test new stain colours over clean timber and choose your perfect tone.

This flooring in a renovation project was darker, but had stared to discolour and patch.

It has come up incredibly well, how gorgeous is the new light blonde finish. When lightening a floor, you can see more variation in plank colour (staining darker evens the planks out and covers the variance), but in this case they’re still all in the same family so I’m happy.
My Favourite Stain Tones:
Natural Oak – A timeless blonde tone with minimal yellowing
Smoky Grey – Modern, cool-toned and works beautifully with many interior styles
Dark walnut – Rich and grounding, perfect for heritage or character homes
Driftwood – Coastal and soft, great in baches or contemporary builds
Chocolate – Deep, elegant, and lush in formal spaces


Step 3: Best Products to Use
Here are some pro-trusted stains and finishes available in New Zealand:
Stain Products:
Bona DriFast Stains – Fast-drying, wide colour range, high-end results. Great for oak floors.
Feast Watson Prooftint – Oil-based, traditional and rich tones. Can be mixed for custom colours.
Cabot's Interior Stain – Easy to work with and budget-friendly for smaller areas.
Rubio Monocoat – A natural oil-based stain that stains and seals in one. Eco-conscious and beautiful matte finish.
Topcoat Finishes:
Bona Traffic HD – Water-based, ultra-durable, low VOC — designer favourite!
Loba 2K Invisible – Matte finish that looks like raw timber (amazing for a modern look)
Osmo Polyx-Oil – Hardwax oil finish, super natural feel, great for families and pets

Here’s another project that had an Australian native hardwood floor.

It was in great condition and has turned out beautifully.
Pro Tip
Sometimes there is an emotional resistance to removing original wood floors to the detriment of the renovation and the investment being made to achieve a desired look. If the floor is in bad condition, a species that cannot be sufficiently altered colour-wise, or there are large parts of it needing to be filled in or replaced creating visual clutter, taking it out and replacing it is the best approach and will utterly transform your home.
Extra Tips:
Always hire a good floor sander. A poor sanding job can leave swirl marks or uneven patches that show up badly once stained. I use Timber Flooring Specialists and have had great results.
Be realistic about imperfections. Older floors will always have some movement, gaps, and colour patchiness, you have to treat it as part of their charm.
Keep a consistent finish throughout open plan areas – mixing stains between spaces can look disjointed.
Maintain it well. Use felt pads on furniture, and avoid harsh chemicals. Recoat every few years to keep it looking fresh.
Thinking About Restaining?
Restaining your floors can completely transform the feel of a home — taking it from tired and dated to clean, fresh, and full of soul. It’s a bit of work, but worth every cent when done well.